

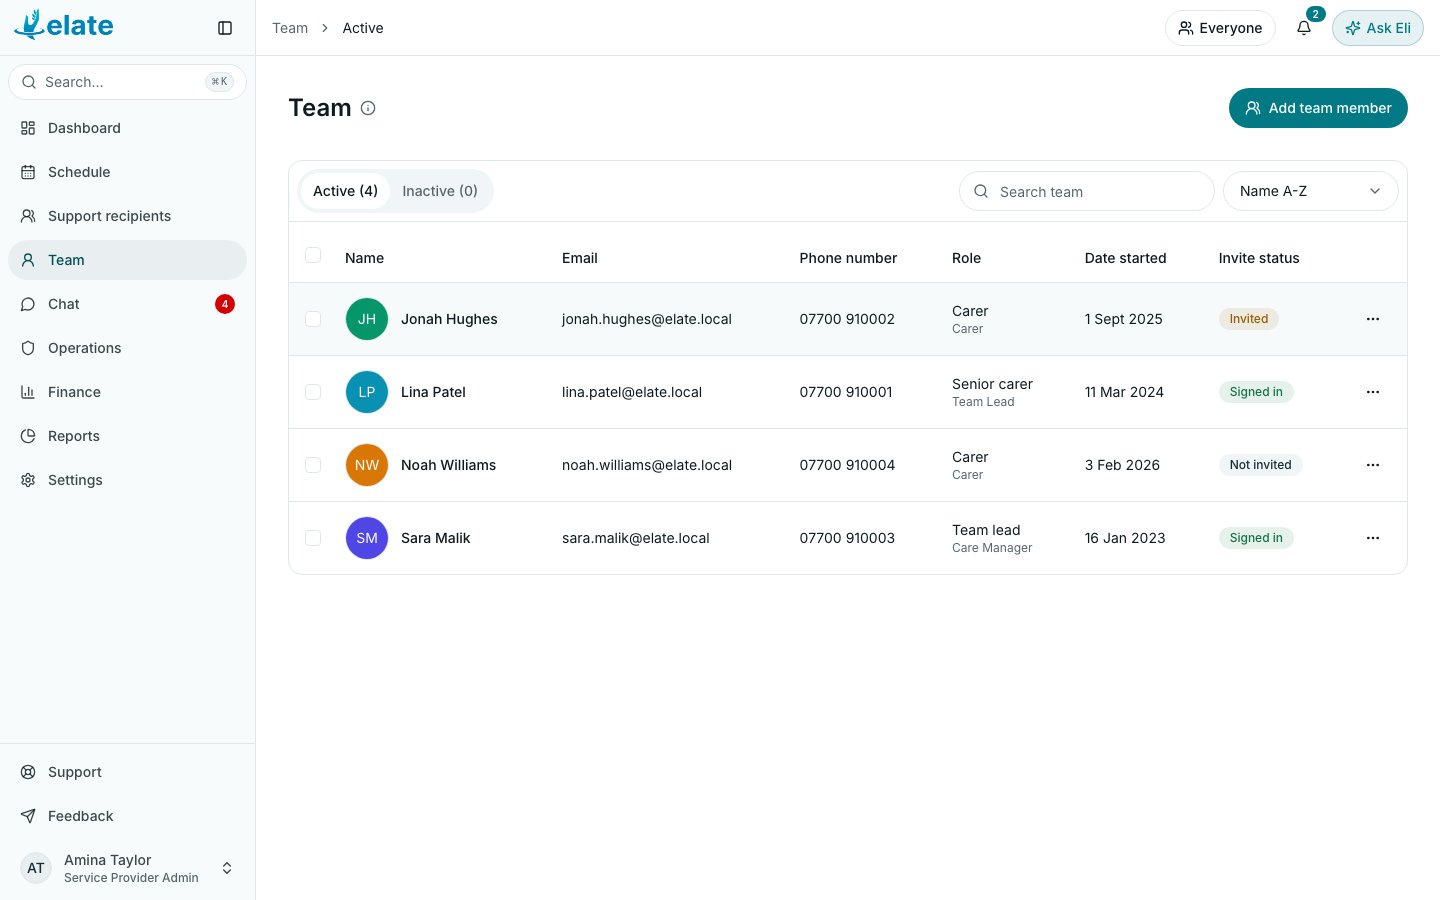
Add a team member
1
Open the team
In Elate on the web, select Team in the sidebar.
2
Start a new record
Select Add team member.
3
Fill in the details
Full name is required. Choose their Role (Carer, Senior carer, Team lead, Coordinator or Manager) and their Web app role. Add an Email if they will sign in. Their home address is used to estimate travel to their first visit of the day, so get the postcode right.The sheet also has phone, start date, employment type, skills, gender, DBS and training expiry dates, Weekly hours (37.5 to start with) and more.
4
Save
Select Create team member. They join the Active tab.
Active team members count towards your subscription, by their web app role. Elate Free includes up to 2 staff, the account owner included. Plans and billing are managed in Elate on the web, under Billing in the profile menu.
Invite them to Elate
- One person
- Several people
Open their profile, select the three-dot menu beside Edit profile and choose Send invite. You can also select Send invite on the Access tab.
Only Organisation Owners, Service Provider Admins and Care Managers can send invites. When the person signs in with the invited address, Elate joins them to your organisation with their web app role and their status becomes Signed in.
To send another invite, open the row’s actions menu and choose Resend invite. If you change the email address of someone who has not joined yet, their old invite stops working: Elate says Their invitation was sent to the old address. Send a new one after saving. The Access tab lists every invite email under Email events, with its status. What the person does next is in Joining your team.
The profile
The header shows their operational role and web app role, Start date, Weekly hours, DBS expiry and an App access badge. The tabs are Overview, Schedule, Availability, Notes, Documents and Access. To change their details or role, select Edit profile, make your changes and select Save profile. Web app role sets what they can do in Elate, and a change applies to their access straight away.Who can change a role
The Web app role list only offers roles you are allowed to give:- An Organisation Owner can give any role. Only an Owner gives or removes the Organisation Owner role.
- A Service Provider Admin can give any role except Organisation Owner.
- A Care Manager can give Carer, and any other role below Owner and Admin whose permissions their own role already holds in your organisation’s Settings > Permissions.
- Anyone else who can edit team records can give Carer only.
- Once someone has joined, only an Owner or Admin can change their role.
When someone leaves
There are two separate steps. Deactivate the record (anyone with Team). On the Team list, open the row’s actions menu and choose Deactivate…, then Deactivate. You can also set the status menu in their profile header to Inactive.- They are no longer offered when you assign a visit.
- Visits already on the schedule keep their name. Reassign any future visits you still need covered.
- Their sign-in is not changed.
- Nothing is deleted. To bring them back, choose Make active on the Inactive tab.
1
Open Access
Open their profile and select the Access tab.
2
Close the account
Select Close account. Give a reason, such as “left the service”.
3
Deal with future visits
If they have future visits, the dialog offers to unassign them. Leave that box ticked to take them off those visits.
4
Confirm
Select Close account. Every record they made is kept.
Common questions
They did not get the invite
They did not get the invite
Check the email address on their record with Edit profile, then send the invite again. The Email events list on the Access tab shows whether the email went.
Why does someone show Invited when I never sent an invite?
Why does someone show Invited when I never sent an invite?
Invited means the record has an email address and the person has not signed in yet. If there is no Sent date under the badge, no invite has gone. Use Send invite.
Can I add a team member to a group from here?
Can I add a team member to a group from here?
Yes. Tick them on the Team list and select Add to group, or use the row’s actions menu. See Groups and offices.